Currencies
Coins, gems, balls, gold balls, pet essence, ores and bars, prestige points, Hoard shards, achievement points, bounty points, sticker stars, chest keys and more — what each is for, every source and every sink.
Overview
Ballin Tycoon runs on five wallet currencies — Coins, Gems, Balls, Gold Balls and Pet Essence — plus a handful of resources that live outside the wallet: Marquee stars (your Renown), Arcade candy, Ticket Trove tickets, Time Candy and the Ballin’ Potion. This page lists what every one of them is for, every way to earn it and every way to spend it. Exact bin odds live on Bucket Rates.










On top of those sit the progression currencies: the ores and bars the bins pay, and the purses that belong to The Hoard, Prestige, Bounties, the sticker album and the Boneyard. Each one is earned in one system and spent in that system's own shop, and none of them can be traded between players.


Coins
Coins are the fuel for the ARCADE machine: every shot costs 1,000 coins × your stake, and those shots are what raise your Arcade level. Almost every coin you earn comes from balls landing in the coloured bins on the board.
The flat coin economy
Coins are a flat rate per bin type — your level never changes what a bin pays. Every coin bin has a fixed share of a 20,000-coin basis (a Normal bin pays 0.5% of it, a Ruby bin 10%), and the only things that scale that number are the world you play on and your multipliers. Two per-world layers apply, and they compound:
| World | Bin coin scale | World coin multiplier | Combined |
|---|---|---|---|
| W1 Meadow | ×1 | ×1 | ×1 |
| W2 Aurora | ×1.25 | ×1.1 | ×1.375 |
| W3 Flora | ×1.5 | ×1.2 | ×1.8 |
| W4 Maelstrom | ×1.75 | ×1.3 | ×2.275 |
| W5 Inferno | ×2 | ×1.4 | ×2.8 |
The bin coin scale multiplies the bin’s base share; the world coin multiplier then multiplies all earned coins on that world (bins, Bonus Wheel and Jackpot Frenzy alike). Together with your multipliers the full formula for a landing is: bin share × 20,000 × bin coin scale × world multiplier × (1 + Coin Gain%) × pet and item multipliers.
Coins per bin, by world
| Bin | Share of basis | W1 Meadow | W2 Aurora | W3 Flora | W4 Maelstrom | W5 Inferno |
|---|---|---|---|---|---|---|
| Normal | 0.5% | 100 | 138 | 180 | 228 | 280 |
| Bronze | 1% | 200 | 275 | 360 | 455 | 560 |
| Silver | 1.5% | 300 | 413 | 540 | 683 | 840 |
| Gold | 3% | 600 | 825 | 1,080 | 1,365 | 1,680 |
| Emerald | 6% | 1,200 | 1,650 | 2,160 | 2,730 | 3,360 |
| Ruby | 10% | 2,000 | 2,750 | 3,600 | 4,550 | 5,600 |
Diamond bins do not pay coins directly — a Diamond landing starts Jackpot Frenzy, which seeds its own coin floor (below). How often each bin rolls its coin slot rather than a portal, gold balls or balls is on Bucket Rates.
Other coin sources
| Source | W1 Meadow | W2 Aurora | W3 Flora | W4 Maelstrom | W5 Inferno |
|---|---|---|---|---|---|
| Bonus Wheel · COINS slice (34% of spins) | 40,000 | 66,000 | 96,000 | 130,000 | 168,000 |
| Jackpot Frenzy · starting coin floor | 50,000 | 68,750 | 90,000 | 113,750 | 140,000 |
| Ball Grove basket · coins roll (regular / hard) | 200K / 300K | 200K / 300K | 200K / 300K | 200K / 300K | 200K / 300K |
 Meadow Mole · Buried Treasure dig | 2,500 | 2,500 | 2,500 | 2,500 | 2,500 |
Chest Rush, tournaments and sticker set rewards also pay coins — see their pages. The Shop sells coin packs and pet bundles whose coins are multiplied by your best world and Coin Gain stat.
Coin multipliers
- Coin Gain — the Marquee pays a +1% Coin Gain row about once every 7 Arcade levels (+12% by Arcade level 100, +68% at the top of the ladder). The bars' Upgrades page, heirlooms and Sticker Upgrades each carry a Coin Gain row of their own.
- Pets —
 Piggy Banker,
 Coin Corgi and
 Dragon Hatchling carry coin abilities; pet items with a Coin Gain stat stack on top.
- Vinnie’s Bonuses — the Ticket Trove’s Coin Gain bonus rides the same multiplier.
- World — the two per-world layers above.
Spending coins: Arcade stakes
Coins have two sinks. The Upgrades page's higher rows — GOLD BALL GAIN, TRIPLE CRAFT CHANCE, GATE CRIT CHANCE, RICH VEINS, GATE DAMAGE PER PET — and every row on the World 2-5 tabs take coins beside their bars, on the same climbing curve, from a base that grows by world. The other is the Arcade. Each launch costs 1,000 × stake and pays candy × stake, so higher stakes buy speed, not value. Stakes above ×1 open permanently with your Arcade level (×2 at Arcade Lv 10, ×3 at Arcade Lv 30, ×5 at Arcade Lv 50, ×10 at Arcade Lv 70, ×25 at Arcade Lv 90, ×50 at Arcade Lv 110, ×100 at Arcade Lv 130).
| Stake | Coins per launch | Coins you must hold |
|---|---|---|
| ×1 | 1,000 | always available |
| ×2 | 2,000 | always available |
| ×3 | 3,000 | always available |
| ×5 | 5,000 | always available |
| ×10 | 10,000 | always available |
| ×25 | 25,000 | always available |
| ×50 | 50,000 | always available |
| ×100 | 100,000 | always available |
| ×200 | 200,000 | always available |
Gems
Gems buy pets. Their main use is the Pet Crates, where each world's crate costs more than the last, and a one-off 100 to found a guild. Gems never inflate, which is why the daily gifts and quests pay in gems.
Gems per bin, by world
| Bin | W1 Meadow | W2 Aurora | W3 Flora | W4 Maelstrom | W5 Inferno |
|---|---|---|---|---|---|
| Gold | 2 | 1 | 3 | 1 | 1 |
| Emerald | 4 | 4 | 6 | 2 | 3 |
| Ruby | 6 | 6 | 9 | 3 | 5 |
Only Gold, Emerald and Ruby bins carry a gem slot; nothing below Gold pays gems in any world. The chance that a landing rolls the gem slot is on Bucket Rates.
Other gem sources
| Source | W1 Meadow | W2 Aurora | W3 Flora | W4 Maelstrom | W5 Inferno |
|---|---|---|---|---|---|
| Bonus Wheel · GEMS slice (14% of spins) | 75 | 100 | 125 | 150 | 200 |
| Jackpot Frenzy · starting gem floor | 125 | 155 | 190 | 220 | 250 |
- Breaking a world lock
- 1,000
- Free Gift (every 8h)
- 50
- Daily Quest task (5 a day)
- 25 each
- Weekly quest chests
- 50 pts → 100 · 100 pts → 150 · 150 pts → —
- Sticker Vault
- PINK — · BLUE 500 · GOLD 1,000
- Salvaging a paid-for pet
- 20% chance of a gem drop: common 10 · uncommon 20 · rare 40 · epic 80 · legendary 160 · mythic 640
- Inviting friends
- 1 friend → 100 · 3 friends → 300 · 5 friends → 500 · 10 friends → 1,000 · 20 friends → 2,000 · 30 friends → 3,000 · 40 friends → 4,000 · 65 friends → 5,000 · 80 friends → 6,000
- Meadow Mole · Buried Treasure dig
- 1
- Shop gem packs
- 250 – 20,000 gems
Pet crate prices
| World | Price per pull | Intro price |
|---|---|---|
| W1 Meadow | 200 | — |
| W2 Aurora | 300 | 225 for the first 50 paid pulls (25% off) |
| W3 Flora | 400 | 300 for the first 50 paid pulls (25% off) |
| W4 Maelstrom | 500 | 375 for the first 50 paid pulls (25% off) |
| W5 Inferno | 600 | 450 for the first 50 paid pulls (25% off) |
Free pulls never use up the intro allowance. Every rate the crates roll is on Pet Crate Odds.
Balls
Balls are what you launch. You start with 500, regenerate one every 30s up to your cap — even while you are away — and every launch spends exactly one. The cap is soft: bins, Time Candy, quests and purchases can push you far above it; only regeneration stops there. Everything about the cap, offline regeneration and the Ballin’ Potion is on Offline earnings.
Balls per bin, by world
| Bin | W1 Meadow | W2 Aurora | W3 Flora | W4 Maelstrom | W5 Inferno |
|---|---|---|---|---|---|
| Bronze | — | — | — | — | — |
| Silver | 1 | 1 | — | — | — |
| Gold | 2 | 2 | 1 | 1 | 1 |
| Emerald | 3 | 3 | 2 | 2 | 2 |
| Ruby | 4 | 4 | 3 | 3 | 3 |
Normal bins never return balls. A dash means that bin has no ball slot on that world — its chance goes to coins instead. W4 Maelstrom pays fewer balls per bin (and rolls the ball slot less often) because its dive board pays balls on every landing — see World 4.
Other ball sources
| Source | W1 Meadow | W2 Aurora | W3 Flora | W4 Maelstrom | W5 Inferno |
|---|---|---|---|---|---|
| Bonus Wheel · BALLS slice (17% of spins) | 125 | 160 | 200 | 250 | 300 |
| Jackpot Frenzy · starting ball floor | 125 | 155 | 190 | 220 | 250 |
- Passive regeneration
- 1 ball every 30s while below your cap — online or offline
- Time Candy
- 30 Minute Candy → 60 · 1 Hour Candy → 120 · 2 Hour Candy → 240 · 4 Hour Candy → 480
- Free Gift (every 8h)
- 100
- Daily Quest task
- 50 each
- Weekly quest chests
- 50 pts → 300 · 100 pts → 600 · 150 pts → 1,000
- MINES (Arcade right ring)
- 50 floor up to 10,000 for a full clear
- Sticker Vault
- PINK 300 · BLUE 600 · GOLD 1,000
- Guild ball gifts
- 50 balls per gift at guild level 1 (+10 per guild level), 3 gifts per request, one request every 8h
- Ball Grove basket
- 20 regular / 30 hard
- Meadow Mole · Buried Treasure dig
- 3
- Sticker sets, tournaments, Chest Rush, Bonus Map
- see each page
- Shop ball packs and bundles
- 500 – 40,000 balls a pack
Gold Balls
Gold Balls are pet food: every pet level costs gold balls, and the price climbs with the level and the pet’s rarity. The board’s bins are the steady source — every tier has a gold-ball slot — and the amount is the same on every world.
Gold balls per bin
| Bin | Gold balls | Chance the slot rolls |
|---|---|---|
| Normal | 2 | 33.3% (1 in 3) |
| Bronze | 5 | 32.1% (1 in 3.12) |
| Silver | 10 | 13.1% (1 in 7.63) |
| Gold | 20 | 10.9% (1 in 9.17) |
| Emerald | 30 | 21.7% (1 in 4.61) |
| Ruby | 50 | 16.8% (1 in 5.95) |
Shown before multipliers. Golden Balls unlocks, the Marquee, pet items and card set bonuses all multiply the base amount.
Other gold-ball sources
| Source | W1 Meadow | W2 Aurora | W3 Flora | W4 Maelstrom | W5 Inferno |
|---|---|---|---|---|---|
| Bonus Wheel · GOLD BALLS slice (27% of spins) | 600 | 900 | 1,200 | 1,500 | 2,000 |
| Jackpot Frenzy · starting gold-ball floor | 1,000 | 1,250 | 1,500 | 1,750 | 2,000 |
| Ball Grove basket (regular / hard) | 250 / 400 | 250 / 400 | 250 / 400 | 250 / 400 | 250 / 400 |
- Weekly quest chest (150 pts)
- 2,500
- Meadow Mole · Buried Treasure dig
- 25
- Dragon Hatchling
- its gold-ball ability mints extra gold balls on landings — see the pet page
- Bingo reward track, Chest Rush, Vinnie's bonuses
- see each page
- Shop
- the Golden Balls unlocks multiply every gold ball the board pays (up to ×2)
Spending gold balls: pet levels
The cost to raise a pet one level depends only on its rarity and current level (stars do not steepen it). The last column is the total from level 1 to 100; levels past 100 keep climbing — see Pets.
| Rarity | Lv 1 → 2 | Lv 10 → 11 | Lv 25 → 26 | Lv 50 → 51 | Lv 75 → 76 | Lv 99 → 100 | Total to Lv 100 |
|---|---|---|---|---|---|---|---|
| COMMON | 50 | 71 | 117 | 227 | 375 | 555 | 24,997 |
| UNCOMMON | 99 | 142 | 235 | 454 | 751 | 1,111 | 50,019 |
| RARE | 199 | 284 | 471 | 907 | 1,502 | 2,220 | 100,009 |
| EPIC | 349 | 497 | 824 | 1,588 | 2,627 | 3,884 | 175,001 |
| LEGENDARY | 549 | 782 | 1,294 | 2,495 | 4,129 | 6,104 | 275,013 |
| MYTHIC | 798 | 1,137 | 1,883 | 3,629 | 6,005 | 8,878 | 400,015 |
Pet Essence
Pet Essence is the currency of the pet workshop. You get it by salvaging pets you do not need, scrapping spare pet items (2,500 each, an Evolution Stone 10,000), and from the Arcade: filling the left portal ring (200 bumps) starts a double-or-done coin flip that opens at 50, doubles on every heads and retires after 5 heads — up to 1,600 — at most 3 times a day.
Essence from salvaging
| Rarity | Essence per pet |
|---|---|
| COMMON | 100 |
| UNCOMMON | 200 |
| RARE | 400 |
| EPIC | 800 |
| LEGENDARY | 1,600 |
| MYTHIC | 10,000 |
Every regular and limited pet salvages for its full essence, free-pull and starter copies included. Salvaging a copy you paid for also has a 20% chance to drop gems (see Gems above); free-pull copies skip that gem roll.
Essence costs
| Rarity | Fuse to 2★ | Fuse to 3★ |
|---|---|---|
| COMMON | 500 | 1,500 |
| UNCOMMON | 1,000 | 3,000 |
| RARE | 1,500 | 4,500 |
| EPIC | 2,000 | 6,000 |
| LEGENDARY | 2,500 | 7,500 |
| MYTHIC | 15,000 | 50,000 |
Fusion is guaranteed — the essence is the whole price. Making a max-star pet shiny by fusing in a shiny of the same species costs 10,000.
| Rarity | Evolution |
|---|---|
| COMMON | 25,000 |
| UNCOMMON | 50,000 |
| RARE | 75,000 |
| EPIC | 100,000 |
| LEGENDARY | 150,000 |
Evolution also consumes Evolution Stones — see Pet Evolution.
Marquee stars (Renown)
Your Renown is simply your Arcade level: every level you clear is one Marquee star, and every star is one rung on the Marquee ladder. The ladder pays a reward on every level up to 500 — 500 rows in all — mixing a handful of feature unlocks with a repeating rotation of permanent buffs. Read Renown for how the ladder claims itself and Arcade level for the level curve.
Candy (Arcade XP)
Candy is the Arcade’s score. Every pinball that drops into a bin pays candy (× your stake), the centre door pays candy cards, and the bar fills towards your next Arcade level. Candy is not a currency you can spend — it is your experience points.
Tickets
Tickets belong entirely to the Ticket Trove, the machine that opens when you break Gate 6 of The Hoard. They tick up on their own, keep accruing for up to 12h while you are away, and are only ever spent inside the Trove.
Time Candy
A Time Candy is a bottled block of regeneration: using one instantly grants the balls that many minutes of natural regeneration would have produced (one ball per 30s), and — unlike regeneration — it banks over the cap, so you keep the whole grant.
| Candy | Time | Balls | Drops from |
|---|---|---|---|
 30 Minute Candy | 30m | 60 | Silver 0.025% (1 in 4,000) per landing |
 1 Hour Candy | 1h | 120 | Gold 0.0333% (1 in 3,000) per landing |
 2 Hour Candy | 2h | 240 | Emerald 0.05% (1 in 2,000) per landing |
| 4 Hour Candy | 4h | 480 | Ruby 0.1% (1 in 1,000) per landing |
Candy drops are an extra roll on top of the bin’s normal reward. The Ball Grove basket can also roll candy (30 Min 2.18% (1 in 45.9), 1 HR 1.08% (1 in 92.3)).
Ballin’ Potion
Drink a Ballin’ Potion and your ball regeneration jumps to one ball every 2s — 15× the normal rate — for 10m. Share it with a friend instead and you both get 20m. Potions stack (another potion extends the timer), and the clock freezes while you sit at your ball cap, so none of it is wasted. Potions come from the Bingo reward track (11 across the track, at milestones 10, 20, 30, 40, 50, 60, 70, 80, 90, 100 points) and the post-event Bingo shop (up to 3 per event). Full details on Offline earnings.
Ores and bars
Every bin except the Diamond one pays a metal ore on top of its normal reward, and each bin colour has its own metal: the grey bin pays the world's cheapest ore and the Ruby bin its rarest. Each world has its own set of 6 metals, so 5 worlds means 30 ores and as many bars. Expeditions dig the same ores while you are away. Ore does nothing on its own — the Crafting page pours it into bars, and bars are what the progression shops charge.
- Ore per landing — every world pays the same 1 ore per landing before upgrades (times the ore's richness, below). A later world pays its own metals, not bigger numbers, and its prices are written in the same digits as W1 Meadow's.
- Ore per bar — the recipe climbs bar by bar, from 4 ore for the first W1 Meadow bar to 250 for the last W5 Inferno bar. Rarer ores come proportionally thicker, so a better bar takes more ore without taking longer to earn.
- Where bars go — the 57-row Upgrades page (it uses 30 different bars), The Armory, Bounty hand-ins, Ball Factory machines, mineshafts on Expeditions, Research Hall projects and fossil revivals.
- Collecting ore is also what fills your player level — see the next section.
Every ore and its bar
| World | Bin | Ore | Bar | Ore per bar |
|---|---|---|---|---|
| W1 Meadow | Normal |  TIN ORE |  TIN BAR | 4 |
| W1 Meadow | Bronze | 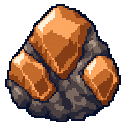 COPPER ORE | 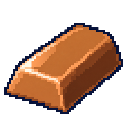 COPPER BAR | 5 |
| W1 Meadow | Silver | 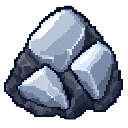 SILVER ORE |  SILVER BAR | 6 |
| W1 Meadow | Gold | 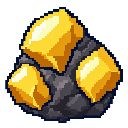 GOLD ORE |  GOLD BAR | 8 |
| W1 Meadow | Emerald |  VERDITE ORE |  VERDITE BAR | 10 |
| W1 Meadow | Ruby |  CRIMSONITE ORE |  CRIMSONITE BAR | 12 |
| W2 Aurora | Normal |  FROSTITE ORE |  FROSTITE BAR | 15 |
| W2 Aurora | Bronze |  RIMEBRONZE ORE |  RIMEBRONZE BAR | 18 |
| W2 Aurora | Silver |  SNOWSILVER ORE |  SNOWSILVER BAR | 21 |
| W2 Aurora | Gold |  STARGOLD ORE |  STARGOLD BAR | 24 |
| W2 Aurora | Emerald |  AURORANIUM ORE | 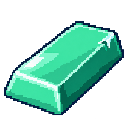 AURORANIUM BAR | 27 |
| W2 Aurora | Ruby | 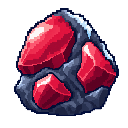 HOLLYSTEEL ORE | 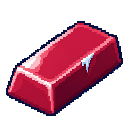 HOLLYSTEEL BAR | 30 |
| W3 Flora | Normal | 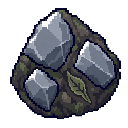 STONEBARK ORE |  STONEBARK BAR | 35 |
| W3 Flora | Bronze |  OAKBRONZE ORE |  OAKBRONZE BAR | 40 |
| W3 Flora | Silver |  BLOOMSILVER ORE |  BLOOMSILVER BAR | 45 |
| W3 Flora | Gold |  LEAFGOLD ORE |  LEAFGOLD BAR | 50 |
| W3 Flora | Emerald |  SYLVANITE ORE |  SYLVANITE BAR | 55 |
| W3 Flora | Ruby |  ROSESTEEL ORE | 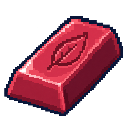 ROSESTEEL BAR | 60 |
| W4 Maelstrom | Normal | 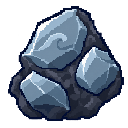 BRINIUM ORE | 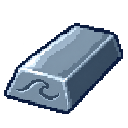 BRINIUM BAR | 70 |
| W4 Maelstrom | Bronze | 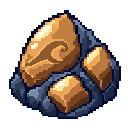 TIDEBRONZE ORE |  TIDEBRONZE BAR | 80 |
| W4 Maelstrom | Silver |  PEARLSILVER ORE |  PEARLSILVER BAR | 90 |
| W4 Maelstrom | Gold |  SUNKGOLD ORE |  SUNKGOLD BAR | 100 |
| W4 Maelstrom | Emerald |  KELPSTEEL ORE |  KELPSTEEL BAR | 110 |
| W4 Maelstrom | Ruby |  CORALSTEEL ORE |  CORALSTEEL BAR | 120 |
| W5 Inferno | Normal |  ASHIRON ORE |  ASHIRON BAR | 140 |
| W5 Inferno | Bronze |  CINDERBRASS ORE |  CINDERBRASS BAR | 160 |
| W5 Inferno | Silver |  SMOKESILVER ORE |  SMOKESILVER BAR | 180 |
| W5 Inferno | Gold |  PYROGOLD ORE |  PYROGOLD BAR | 200 |
| W5 Inferno | Emerald |  VENOMITE ORE |  VENOMITE BAR | 225 |
| W5 Inferno | Ruby |  EMBERSTEEL ORE |  EMBERSTEEL BAR | 250 |
Full drop maths, the crafting page and the upgrade list are on Ores and Bars, Crafting and Upgrades.
Player XP and Prestige Points
Every ore you collect is worth XP, and XP fills the player level shown on the HUD badge (rarer ores and later worlds are worth more). From level 10 you can prestige: the level goes back to 1 and you are paid Prestige Points for how high you climbed. Points buy heirlooms, permanent buffs that survive every prestige, in 4 tiers opened by breaking Hoard gates.
Points per prestige
| Prestige at | Points (before bonuses) |
|---|---|
| Level 10 |  12 |
| Level 30 | 269 |
| Level 40 | 1,105 |
| Level 50 | 3,222 |
| Level 75 | 14,334 |
| Level 100 | 37,547 |
Prestige Point Gain — an heirloom, a Bounty upgrade, the PAIR statues in the Research Hall and the skin ladder — raises the payout, and the Shop's 2x Prestige Points perk doubles it.
Heirloom tiers
| Tier | Opens at | Heirlooms | First unlock costs |
|---|---|---|---|
| Tier 1 | Open from the start | 9 | 6 |
| Tier 2 | 9 gates broken | 6 | 400 |
| Tier 3 | 14 gates broken | 6 | 8,000 |
| Tier 4 | 19 gates broken | 5 | 1,200,000 |
Hoard Shards
The Hoard pays no coins. Its chests pay balls, gems and shards, and shards buy the Hoard's own upgrades — chest speed, Hoard damage and gate damage rows whose price climbs every level. Bigger chests carry more shards, and Shard Gain rows and artifacts multiply the haul.
| Chest | Base shards | Skill points |
|---|---|---|
 COMMON CHEST |  8 | — |
 RARE CHEST | 30 | — |
 LEGENDARY CHEST | 55 |  1 |
 MYTHIC CHEST | 140 | 2 |
 CHAMPION CHEST | 400 | 6 |
Achievement Points
The Achievements board (called Merits until October 2026) lists 151 long-term goals in three tiers — EASY, HARD, EXTREME. Every finished achievement pays 10 Achievement Points of its own tier, and each tier's points are only good in that tier's page of the ACHIEVEMENT SHOP, which costs exactly what the tier pays. A tier opens once every achievement in the tier before it is done.
| Tier | Achievements | Points available | Shop rows | Cost to max the shop |
|---|---|---|---|---|
| EASY | 47 |  470 | 11 | 454 |
| HARD | 51 | 510 | 10 | 500 |
| EXTREME | 53 | 530 | 8 | 522 |
Skill Points
Skill Points buy nodes on the Hoard's Skill Tree; the whole tree costs 7,527 points. Points only start once the tree is open: from gate 12 (the gate that opens it) every gate you break pays 2, Legendary and better chests carry a fixed amount (table above), and any opened chest has a 5% base chance of a bonus point. Before gate 12, gates and chests pay no points.
Bounty Points
A Bounty asks for a stack of bars. Hand them in and it pays 10 Bounty Points before multipliers, and the next bounty asks for a little more. Points buy the Bounty board's upgrade rows, which are strong but reset every time you prestige — they are the part of your build you rebuild each run.
Chest Keys
A Chest Key skips the wait on the Hoard chest your pets are working on. It is time, never loot: the chest pays exactly what it would have paid. Keys come from the top weekly quest chest (150 points), the Shop's Ballin Bundle, and — one find in a hundred — the  Ballin Badger's forage.
Sticker Stars
Every sticker you get pays Sticker Stars equal to its star rarity the moment it arrives, a new card or a duplicate. A gold sticker is worth ×5 and a rainbow one ×25. A sticker a friend gifts you pays none, and gifting one away takes nothing back. Stars open the Sticker Vault's safes and buy the 14 account-wide rows on the Sticker Upgrades page, which have no level cap — each level simply costs more stars than the last.
| Rarity | Regular | Gold | Rainbow |
|---|---|---|---|
| 1★ |  1 | 5 | 25 |
| 2★ | 2 | 10 | 50 |
| 3★ | 3 | 15 | 75 |
| 4★ | 4 | 20 | 100 |
| 5★ | 5 | 25 | 125 |
Bone Dust, slabs and fossils
Expedition crews sometimes bring home a Strange Slab  or a fossil. Slabs are dug out tile by tile in the Boneyard: a part-dug fossil crumbles into 3 Bone Dust per bone tile, and a whole fossil whose recipe you already know pays 6 per tile. Dust buys the Boneyard's perks and, at 150 dust, another slab. Fossils themselves are spent, with bars, to revive fossil pets.
Tips
- Coins do not scale with level, so the fastest way to earn more is to climb worlds — a Ruby bin on W5 Inferno pays 5,600 against 2,000 on W1 Meadow.
- Never buy pet crates with gems before opening the Free Gift and finishing the day’s quests — that is 175 gems a day for free.
- Use Time Candy when you are already at your ball cap: it banks over the cap, while regeneration would have stopped.
- Gold balls are worth most on pets you will actually equip — a mythic pet costs 400,015 to max, a common one 24,997.
See also
- Bucket Rates — Every reward, amount and chance for every bin in every world — coins, gold balls, gems, balls, portals, dice, sticker packs, time candy and pet cards.
- Arcade Level — The Arcade level: how the ARCADE machine turns coins into candy, the full level curve to 100 and beyond, the Marquee reward on every level, stakes and every milestone.
- Shop — Every shop aisle: the perks and perk bundles, the Ballin Bundle, the weekly limited pet FIRE SALE rotation, gem upgrades, ball / coin / gem packs with prices, the free gift and how checkout works on each platform.
- Offline earnings — How balls regenerate online and offline, the ball cap, the WELCOME BACK popup (time away, balls, factory stock, chests by tier), banked Hoard chests, the Ballin’ Potion and Time Candy.
- Daily rewards — Everything that comes back every day: the automatic login streak, the 8-hour Free Gift, the daily quests and weekly chests, and the free daily Bonus Map run.
- The Marquee — One reward on every Arcade level up to 500: the arcade's lock damage, coin gain, gate damage, storage and slots, plus the stake ladder and a few pet features.
- Pets — Every pet in Ballin Tycoon — rarities, crate odds, abilities, natures and jobs, levelling costs, stars, evolution, shinies and where each one comes from.
- Ores and Bars — Every board bin pays a metal ore on top of its prize. 6 metals per world, the recipes that turn them into bars, and what bars are for.
- Crafting — The CRAFTING menu turns bin ore into bars instantly. Every recipe, the CRAFT ALL button, every craft chance, and the ALLOY page.
- Prestige — Reset your level, bars and UPGRADES at level 10+ for Prestige Points, and spend them on 26 permanent heirlooms across 4 tiers.
- The Hoard — Your pets crack chests around the clock and besiege the 50 gates that unlock the rest of the game.
- Achievements — 151 one-time goals in three tiers — Easy, Hard and Extreme — and the Achievement Shop their points buy.
- Bounties — Craft bars and collect ore while a bounty is live - or, rarely, win a raid or grove run - for Bounty Points, build a streak for bonus points, and spend them on upgrades that reset each prestige.
- Sticker Upgrades — The sticker star shop: 14 uncapped upgrades bought with Sticker Stars — global buffs, album might gate damage and pack luck — with every cost and effect.